Deploying a WordPress Site on Azure
Using Azure (Web) App Services for WordPress to deploy a new wordpress site
Deploying a WordPress site on Microsoft Azure is now super dead simple.
Note: This post shows how to setup a new WordPress site and not migrate one from another host to Azure. Migrating an existing wordpress site on another host will require you to use a WordPress migrating tool like WP Vivid which will still work post setting up and configuring a new base WordPress setup in Azure using Azure App Services. You still need to go through the following steps for migration as well.
Goto https://portal.azure.com/#allservices and type in App Services in the Filter Services textbox on top :
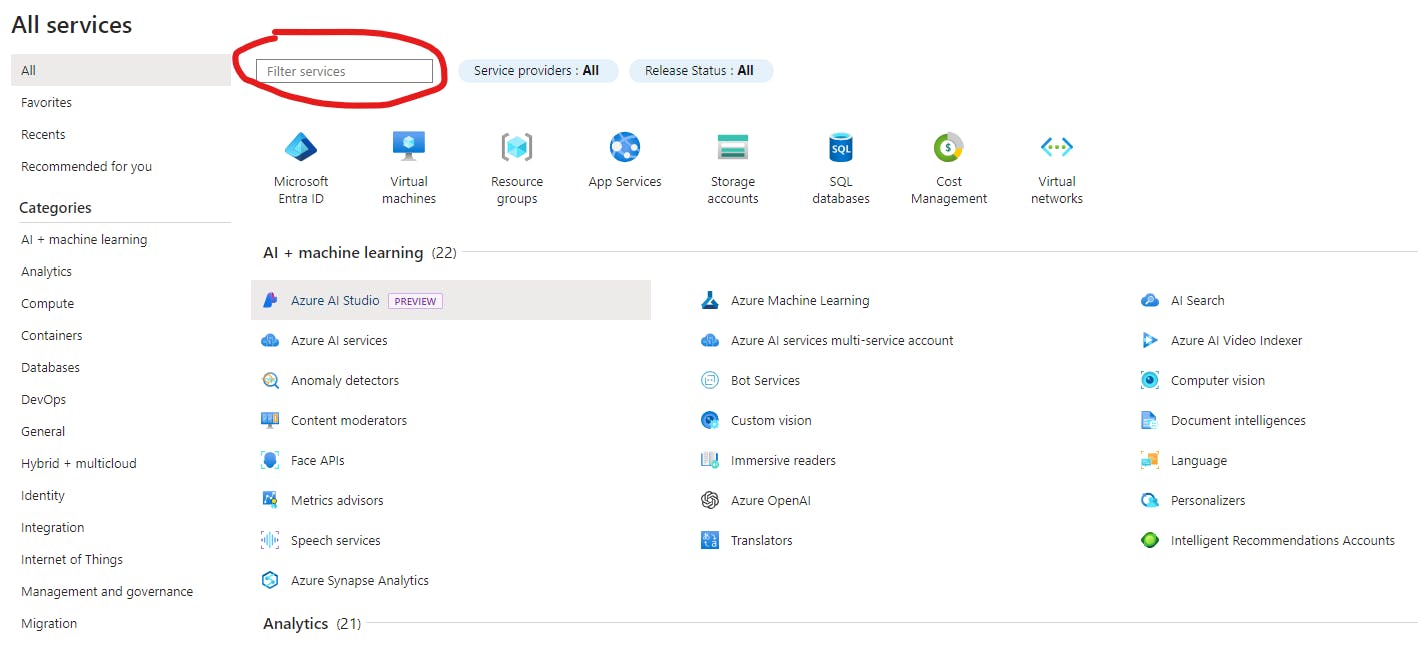
You should be able to see and select App Services option. You should then be redirected to the App Services Page.

Now click on Create on top left. Azure App Services has a (drop-down) option to select WordPress directly on App Service.

You'll be directed to Create WordPress on App Service - Microsoft Azure
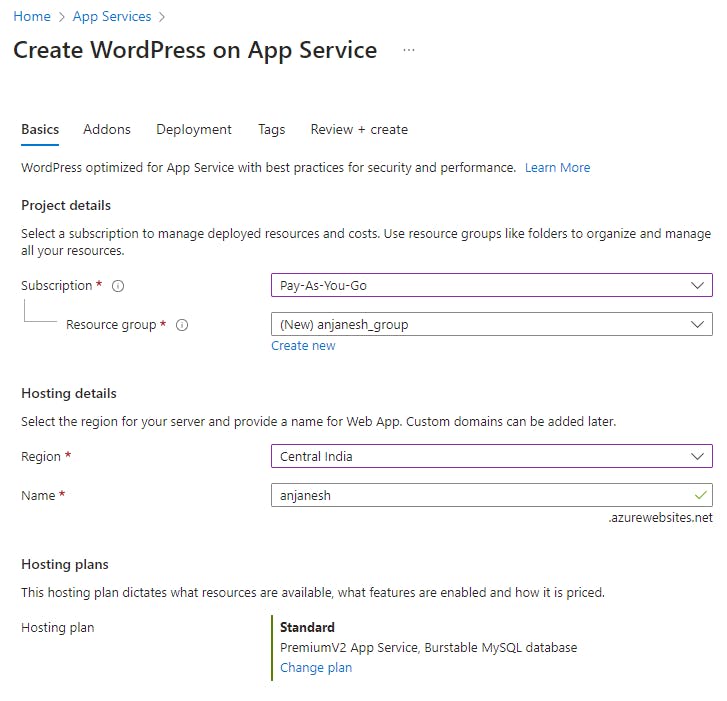
Select your subscription and New Resource Group, I've selected Central India as the region and a name for the sub-domain. It should look like this - but we'll change the hosting plan in the next step.
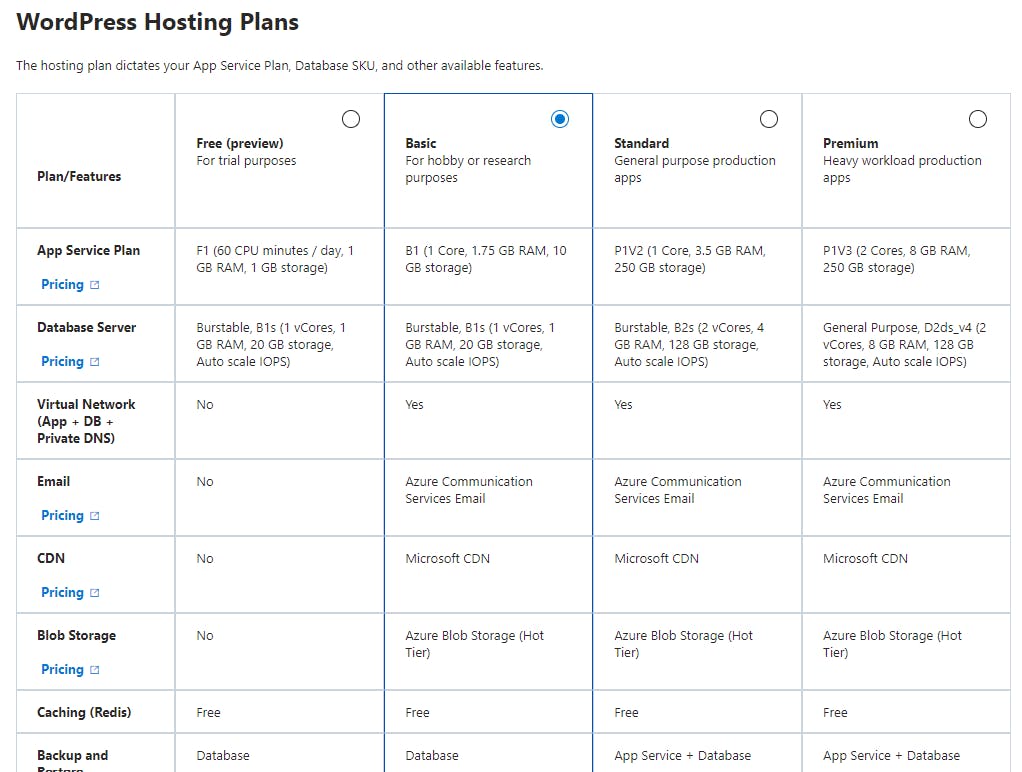
Hosting Plan - the default is PremiumV2 (P1V2) which is not really required for most use-cases unless you're having a high-traffic website. Default PremiumV2 (1 Core, 3.5 GB RAM, 250 GB storage) with a default Burstable MySQL database (2 vCores, 4 GB RAM, 128 GB storage) which comes to about ₹15,000 per month. There is a Free (preview) For trial purposes but you can't map a custom domain to it, so choose "Basic (For hobby or research purposes)" which comes with B1 (1 Core, 1.75 GB RAM, 10 GB storage) at ₹1,116.34 per month and MySQL (1 vCore, 1 GB RAM, 20 GB storage) at ₹982.37 per month making it a total of ₹2,100 per month. If you're looking at Hostinger kind of plans at $10 a month, then Azure may not be for you. There are other services that Azure (Web) App Service for WordPress provides by default - like Email Communication service for sending mails as an alternative to an SMTP plugin, and also provides CDN too for caching static content configured using W3 Total Cache plugin.
Then, in the same tab below it select your default WordPress username and email address and password. (This is for wp-admin)
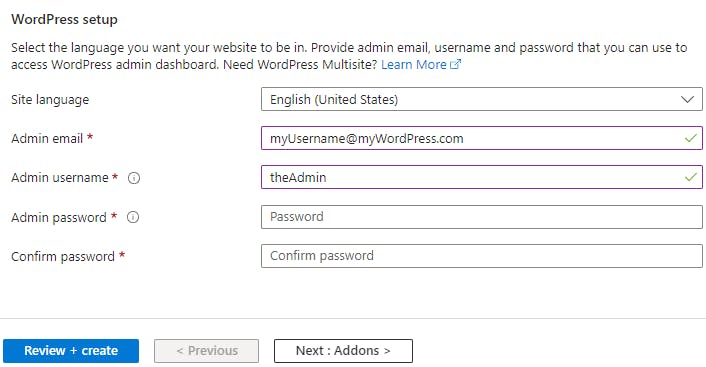
At the end you'll see a summary of your chosen parameters and a blue button to create the WordPress setup.
Once the resource is deployed (it actually takes a few minutes because of the Azure services), you should be able to navigate to your subdomain.azurewebsites.net and see the the default twentytwentyfour theme of WordPress.
If you're are wordpress developer and are thinking ... how do I edit and upload source files like custom themes and plugins - there is an option to use FTP and Shell !
Goto the resource group or directly to the App Service of your newly created wordpress app, and type FTP on the left hand top corner textbox, you should see a Deployment Center tab filtered - there you can select FTP credentials and use those to login to FileZilla or the like.

And if you search for SSH on the left, you'll get an option to login to your site via SSH in the browser automatically without a username and password.
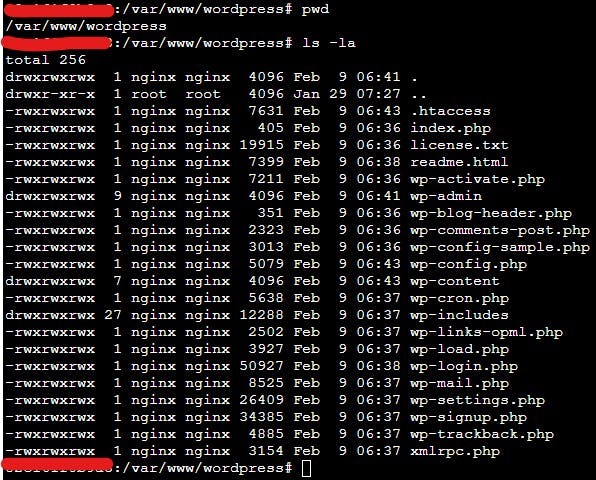
Now you can go crazy will git !
PS: You can even use Azure Cache for Redis configure with W3 Total Cache plugin to cache portions of your site with Redis on Azure but that's an additional measure of step beyond basic caching. (I have always preferred using upstash for redis for small / medium sites, but if you have the bandwidth for more of Azure resources then do go for Azure Redis).
